Showing posts with label DIY. Show all posts

2.25.2013

DIY: Blue Double Strand Statement Necklace

1. Start with jewelry (stringing) wire, jump ring, and crimp bead. You'll also need your pliers.
(I usually cut about 24" of wire... It's better to have it too long, than too short)
2. String crimp bead, and then the jump ring. Loop wire over jump ring and back through the crimp bead.
3. Gently but firmly squeeze the crimp bead using the pliers.
4. Cut off the extra jewelry wire. 
5. String beads and close off the strand the same way you started it. 
6. Make a second strand the same way, attaching it to the first set of jump rings.
 
7. Cut jewelry chain to desired length. 
I usually put a piece around my neck until I like the length, then cut the piece in half to attach the clasp. 
I also chose to use two pieces of chain on each side instead of just one.
8. Open jump ring and attach the two pieces of chain.
9. To finish off the necklace attach jewelry chain to jump rings on each side, as well as attaching a clasp.

If you've never made a necklace before, this might be a little confusing.. 
 Here are my other statement necklace tutorials: 1 2 
They're a lot more detailed, and there are more pictures of each step :)

Inspiration: Banana Republic

1.31.2013

Super Bowl Series: Penalty Flag Center Piece


You will need: 
- 1/2 yard yellow fabric
-  Yellow mini hair rubber bands
- Rice (or anything else to weight it down)
- Mini rubber footballs
- Purple beads
- Basket
To make penalty flags:

And for those super football fans (or wives of those super football fans :p ):
These could also be used for a game! While we were making them, we were throwing them from the couch into the basket in the kitchen. This could be a good way to keep kids entertained.
Another game is, each person gets a flag and anytime they see a penalty during the game, they can throw the flag. Whoever gets the most right could get a gift card or something..
There really are so many possibilities with this! :)


Updated to add: I saw these penalty flags after I made these and  wrote my post.. $3 each! The 1/2 yard of fabric I got at Hobby Lobby, cost me around that much. And I was able to make at least 9, seriously DIY is the way to go on these! So easy to do yourself! 

1.29.2013

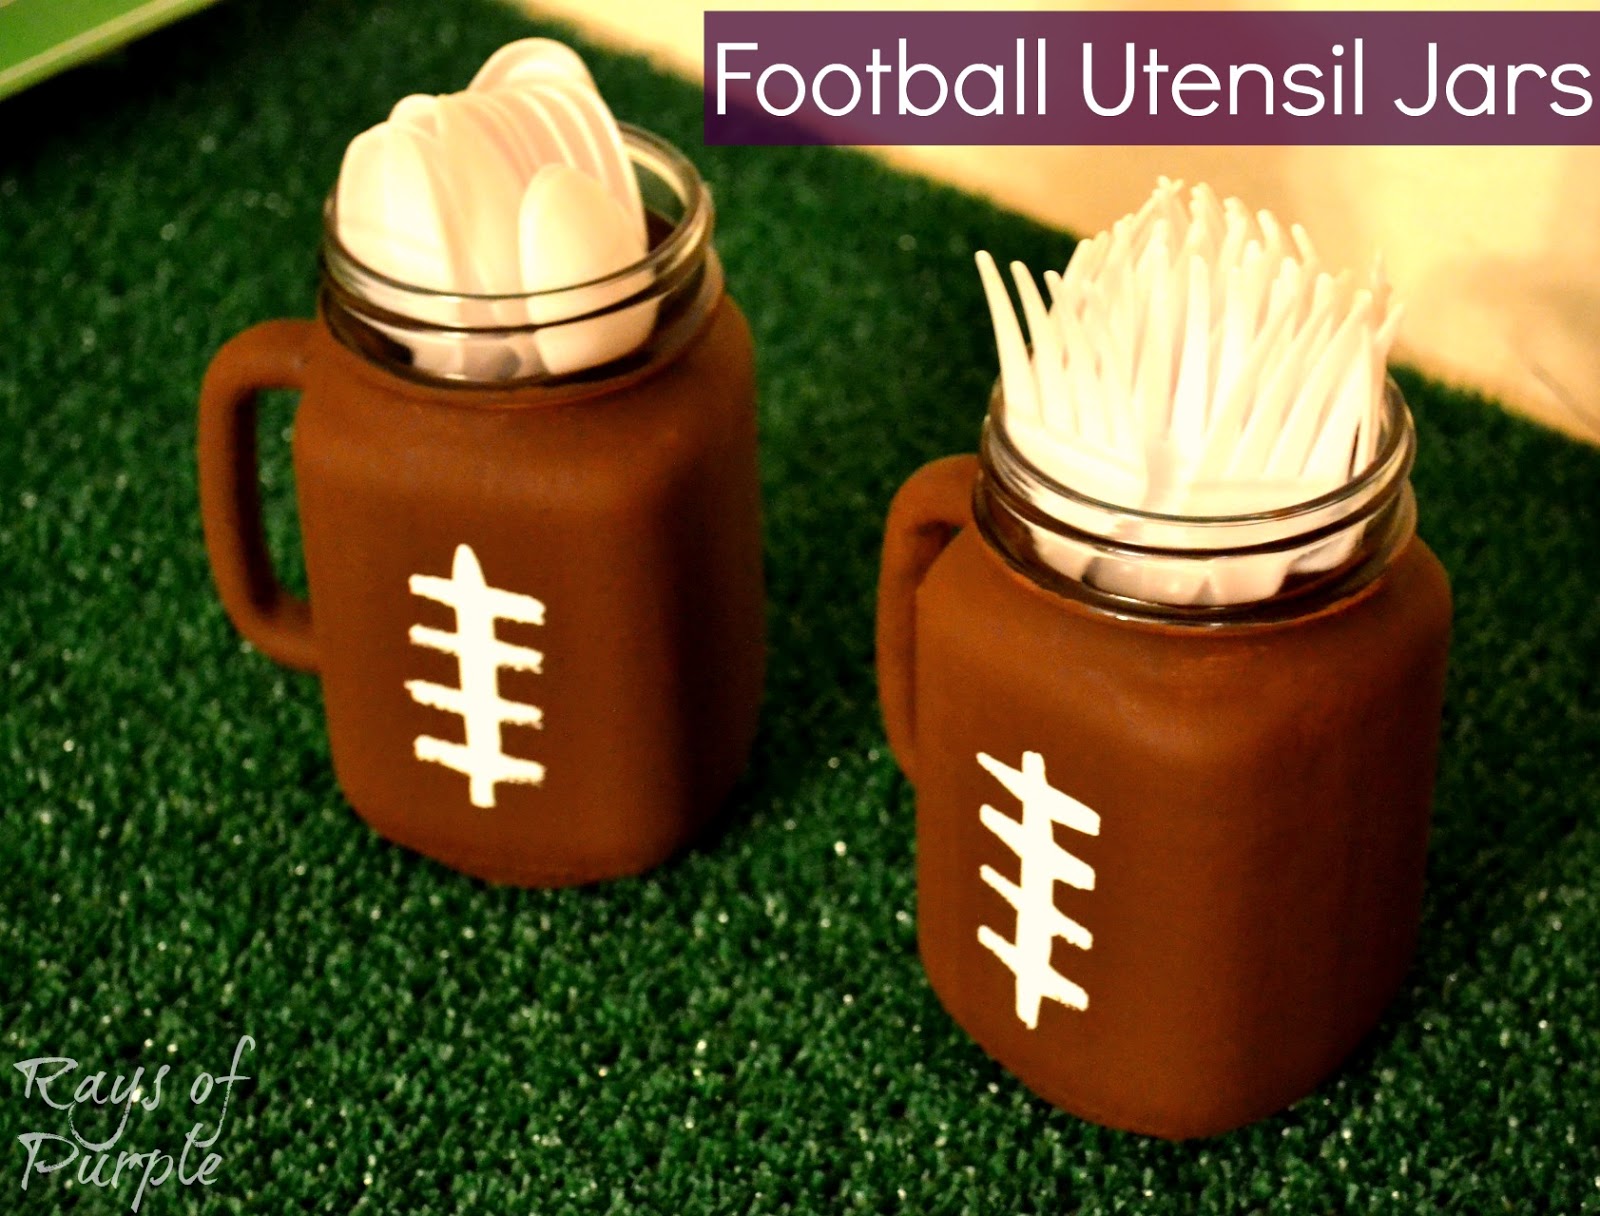
Super Bowl Series: Football Utensil Jars

You will need: 
mason jars (I got these at hobby lobby), paint brushes, brown//white paint


Updated to add:
Want to see a different take on these?! Check out the ones Veronica (Passion, Pink, & Pearls) did here! 

1.17.2013

Easy Organizing: Storing Ribbon

I used wooden sticks that look like mini paint mixing sticks, 
but wide popsicle sticks work too! 
Just wrap the ribbon around, and secure with a map pin. Super easy!
Inspiration: Kreative Jewels

1.01.2013

Easy DIY: Shadowbox Ticket Frame

I know the photos aren't the best.. but I was having a hard time trying not to get a reflection.. Sorry :p 
I don't know why it's taken me so long to share this, but here it is! I've seen these all over Pinterest, most of them say admit one, or don't have a title at all. Well since we're married, there's two of us, so that's how I decided on my title! I just printed it out on card-stock and glued it to another piece of card-stock :) This is a super simple project, and is a great way to display tickets for those of us who don't scrapbook! 

And Happy New Year everyone, I hope 2013 treats you well! :) 


12.31.2012

Glitter Color Block Magnets

December's Cara Box theme was "Holiday Sparkle", and when I think sparkle, I think glitter! So glitter I went with, and this was a simple DIY project I included in the package I sent out :)


They were REALLY easy to make! I used my color block magnet tutorial, then I just carefully used a foam brush to "paint" mod podge onto each other, and put coordinating glitter on top :) I only did one color at a time, and let it dry so the colors wouldn't mix! They were a lot of fun to make.. but I will warn you, glitter is always a complete and total mess, so be careful ;)

12.20.2012

Glitter Light-bulb Ornaments

I used: 
- Old Christmas lights
- Glitter
- Mod Podge 
(or Elmers glue would probably work too)
- Foam Paint Brushes
- Sealer
- Hemp Rope

Each "ornament" consists of two lights

So I was at Target a couple weeks ago and saw some of these, but they were made out of Styrofoam, and I can't say it was really the kind of quality I wanted, but it did give me a great idea!
Now you might not know this about us, but we don't have lights on the house... We wanted to, but it just wasn't on top of our budgeting priority list! This is where The Husband's grandparents come in. They have a house decorating party every year, so a couple days before that happened, we asked them to keep the old bulbs that didn't work anymore. Let's just say, we left with a bunch :)


What to do:
(pictures below directions!)
1. Use a foam brush to "paint" the Mod Podge onto the light-bulb.
2. Pour glitter all over the light-bulb.. And don't say I didn't warn you that it makes a HUGE mess! 
3. Repeat steps 1 & 2 with the second light-bulb.
4. Spray with some kind of sealer. (Optional) 
     I used Mod Podge Acrylic Sealer.. it kind of helped the glitter stay on :p
     I also cut squares in an old box to set the bulbs in so they would stand up straight.. 
5. Cut a piece of hemp rope (or ribbon), and use each end to tie a bow on each ornament, connecting them together. I stumbled across this version on Pinterest, she uses ribbon! :) 
6. Hang your ornament and admire it! 
And the most important step...
7.  Have a MERRY MERRY CHRISTMAS :) 


12.03.2012

DIY Advent Movie Calendar

I wanted to make an Advent Calendar but a lot of the ones I love, like reading a different book every night and doing an activity, are geared towards kids. Well we don't have any kiddies running around, so I decided on Christmas movies! I love love love Christmas movies, even though most of them are super cheesy, it's part of the fun :) So here's what I did:


Oh, and don't forget to write your numbers :)


It would probably be easier to wrap each section, and then glue them together, but I didn't think about it until after I glued the section together, so I just wrapped the whole thing :P


Because of the fact that a few of our movies were on ABC Family, some of the movies needed to be on certain days, but most of them were chosen randomly out of a bowl :) It's up to you, do whatever is easier and works better for you. 


Here's our movie list:
December 1 - National Lampoon's Christmas Vacation
December 2 - Holiday in Handcuffs
December 3 - Holiday in the Sun 
December 4 - Holiday Engagement - Netflix
December 5 - Winnie the Pooh & Christmas too - ABC Family
December 6 - Mickey's Christmas Carol - ABC Family
December 7 - A Christmas Carol (the new one) - ABC Family
December 8 - Crazy for Christmas - Netflix
December 9 - 8 Crazy Nights - Netflix
December 10 - Frosty the Snowman and Rudolph (cartoons)
December 11 - Elf
December 12 - Snow Globe - Netflix
December 13 - 12 Dates of Christmas - Netflix
December 14 - Mr. Magoos Christmal Carol
December 15 - Home Alone
December 16 - Home Alone 2: Lost in NY
December 17 - Miracle on 34th Street
December 18 - Christmas Angel - Netflix 
December 19 - It's a Wonderful Life
December 20 - Secret Santa - ABC Family
December 21 - A Very Brady Christmas - ABC Family
December 22 - A Christmas Carol (the original)
December 23 - The Grinch
December 24 - The Polar Express
December 25 - The Santa Clause 

Inspiration: countryliving.com

11.19.2012

Let's Take a Tour, Shall We?

For the past few weeks I've been settling into my cube at work and trying to make it more of my own. At work there aren't very many ways to express yourself, but a cubicle is one of those ways. I wanted my space to be professional, but give people a glimpse of who I am. :) 

So this is the view when you first walk into my cube, the papers hanging up are work related, but they are hung up with cute and colorful map pins ;) You will also always see a water bottle on my desk, and my fan. I got it at Target for like $20, it's a lifesaver! My mason jars also make an appearance.. I've been made fun of a couple times for the amount of pens I have, but jars just look better when they're full! :p And see those cupcakes? Chocolate cupcakes with Salted Caramel Buttercream :) Everybody loved them! 

To the right, there is a shelf. Complete with two wedding pictures, Pooh Bear, and my paper rose from The Husband :) There's also a Cardinals flag, and fortunes.. I really need to get a Baltimore Ravens flag or something.. It's just easier to get Arizona stuff because we're in Arizona :P 

I love fortune cookies, and when I find a fortune that fits perfectly, I put them up. 
I also color coordinate with the map pins because I am just weird like that :)

To the left... My Sea Shepherd flag and some photos :) I wanted a way to display a lot of different pictures, without having to hang each individual photo up. So I made a mini version of this frame :)  I used mini clothespins, I got them at Party City in the baby shower section.. They worked perfectly! 

Maybe I'm a little too prepared but, when you're at work for 8 hours, I guess it's good to know what you'll want to have around! I have a massive gum supply, band-aids and Advil.  Also, chap-stick, lotion, and hand sanitizer. And of course, note pads, paper clips, and post its :) 

And of course, can't forget snacks can we?! :) 

I also listen to these wonderful things while I work :) Ear buds really hurt my ears, so I finally invested in some good, comfortable head phones. They were not cheap by any means, but they were definitely worth it. 

What are some things you can't live without while you're at work? 
What do you do to personalize your work space? 

11.12.2012

DIY Mondays: Geometric Polymer Clay Earrings

My little sister's birthday is tomorrow, and I wanted to make her something she would like, but something small enough to mail easily. These earrings were the perfect thing!  And they were pretty simple to make :) 


I just guessed on the size, I figured it would be easier to have extra than to not have enough. 

This step is totally optional, and you could completely skip it.
I just found it easier to start with a cube shape. 

They were all a little different, I tried to keep the size of my earring back in mind while I was making them smaller. I didn't want to make them too small. 

I let them cool down for about 10 minutes. 

And there you have it :)

Inspiration: hunryhappened.com and etsy,com